
Rebuilding a Kay K-45 Travel Guitar
By Beverly J.

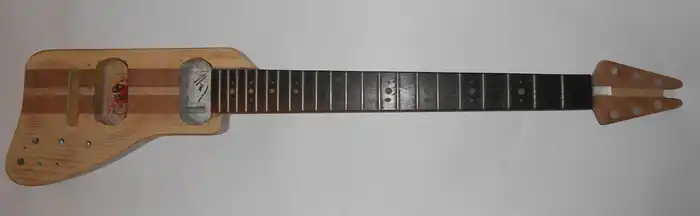
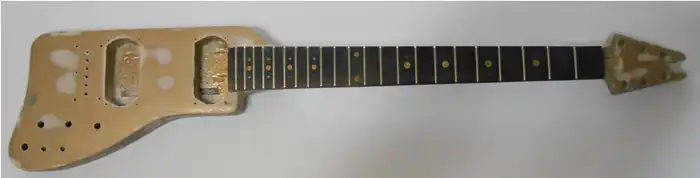
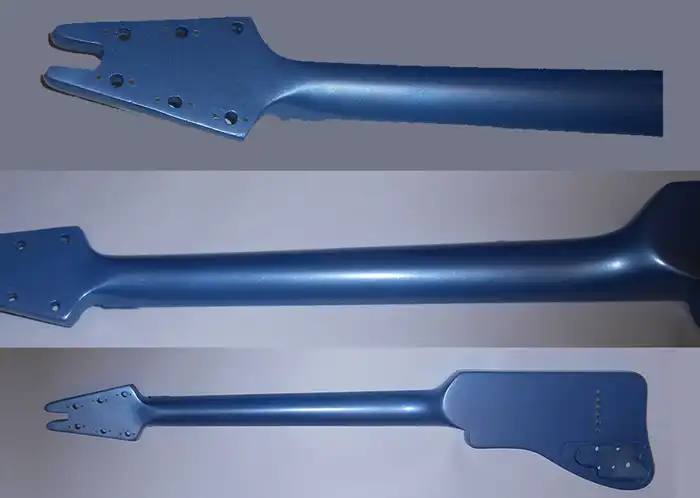
In the winter of 2019, I found a guitar on eBay listed for $190.87. It was in the United Kingdom and had a neck extending to the
tail end of the body. The ad read: "Kay Travel K-45 Rifle Electric Guitar Spares or Repairs Project Stripped". It was what I was
looking for in a guitar, it was a lightweight travel guitar that should weigh around five pounds once complete, and it had a
headstock! All the lightweight guitars I had come across weighed around five pounds, give or take an ounce or two, and always
headless. The K-45 would be a perfect project to start, if the body and neck, once it arrived, weighed around two pounds, and
the neck and body were solid and straight. If the body and neck were close to two pounds, I should be able to keep the guitar,
once completed, less than five pounds.
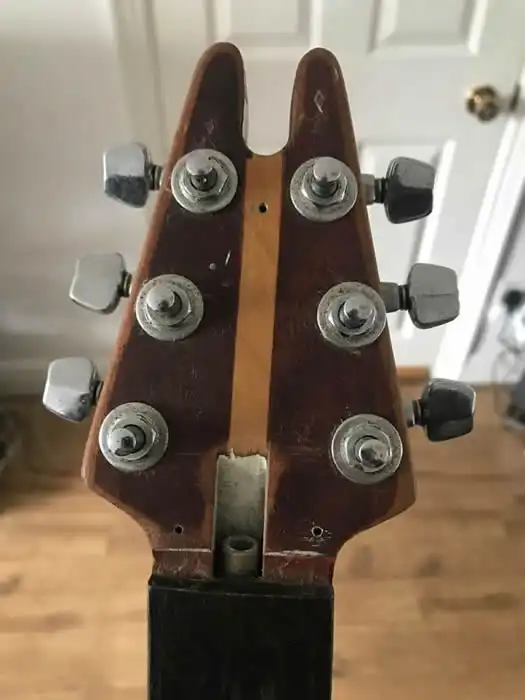
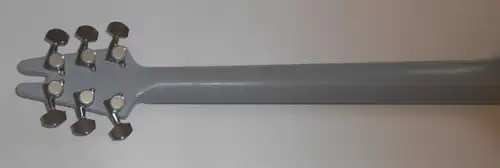
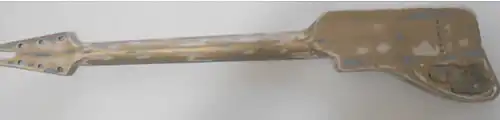
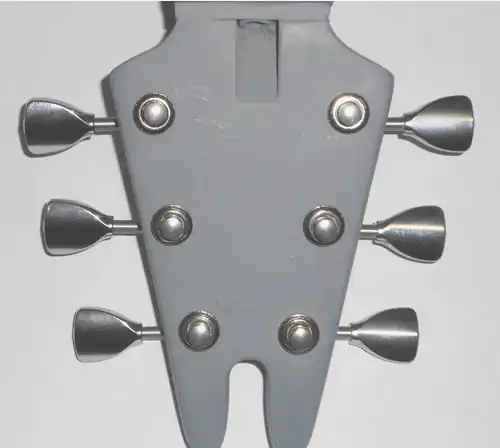
The original tuning machines are closed gear, and too heavy for a lightweight guitar body, and would make the guitar
"neck heavy", and the guitar player would have to constantly prop up the guitar's neck while playing.
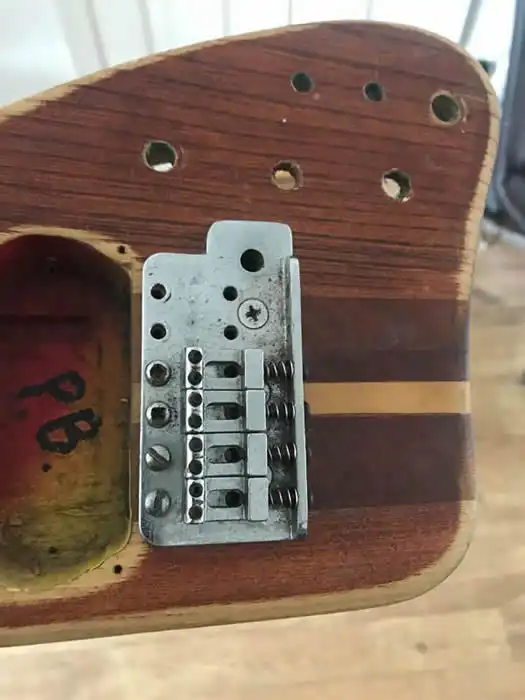
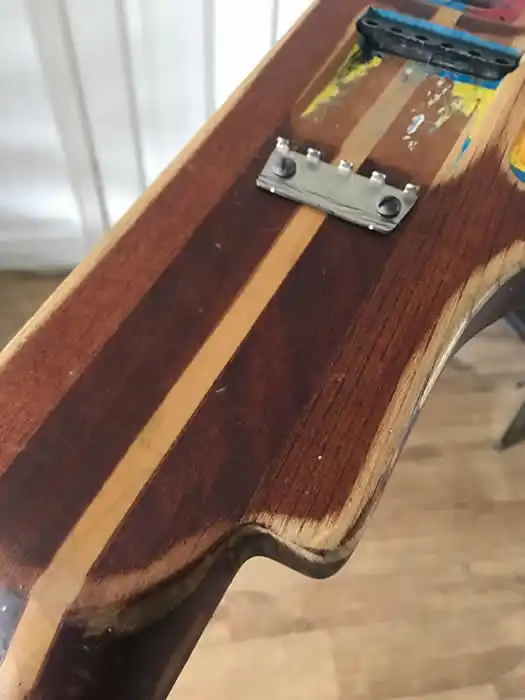
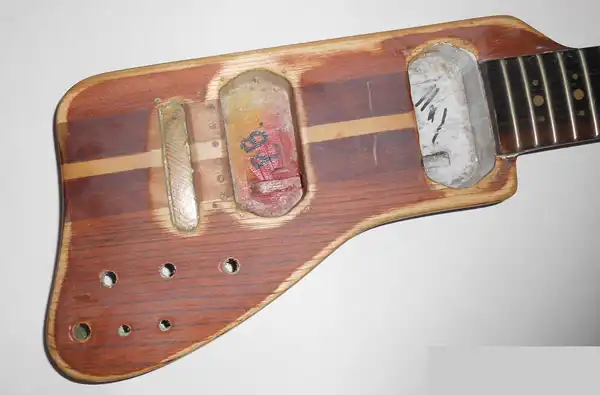
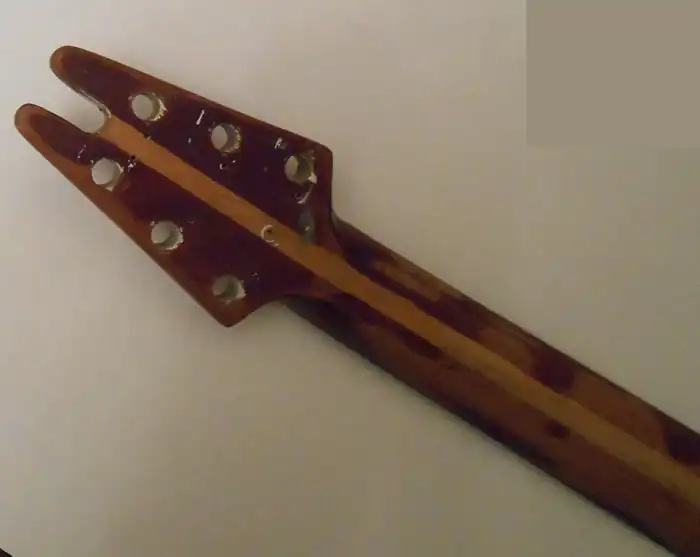
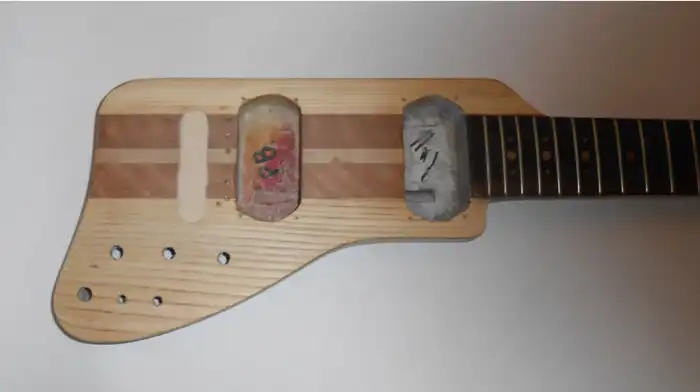
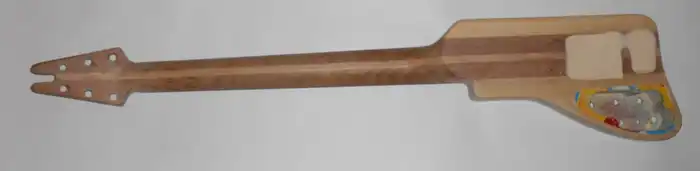
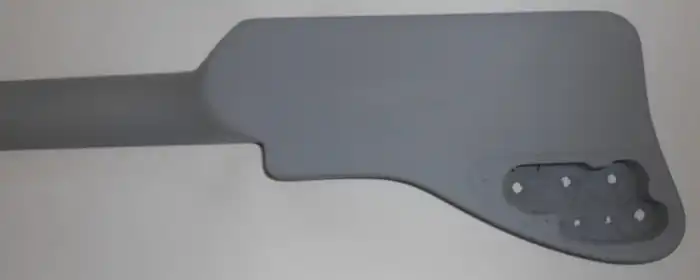
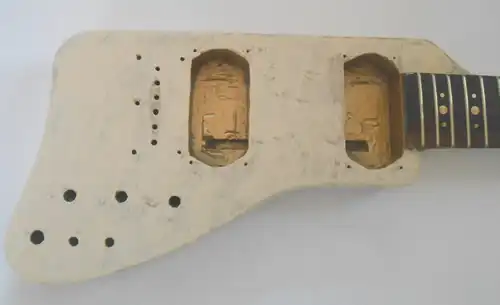
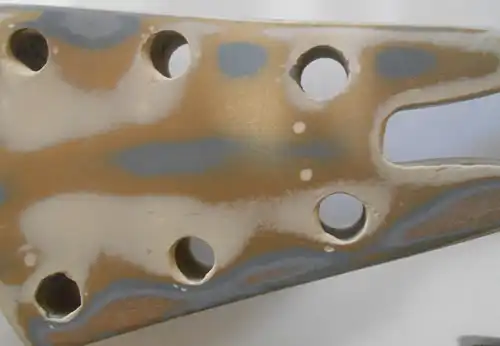
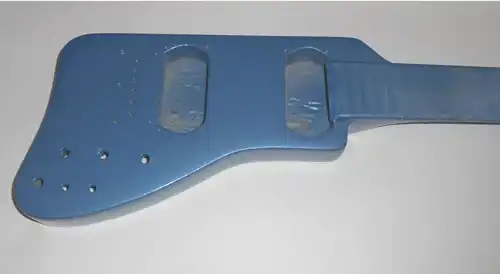
The bridge was installed off center, forcing the high E string off the fret board, making it impossible to string all six strings
on the guitar. The bridge came with the B and E string saddles missing. Note the neck ending at the end of the body.
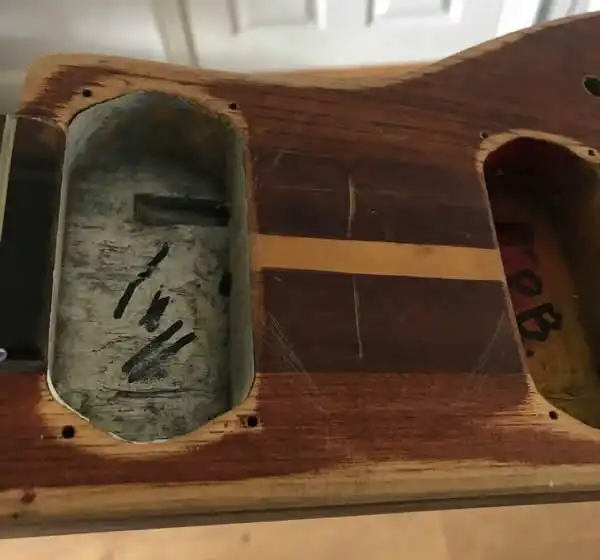
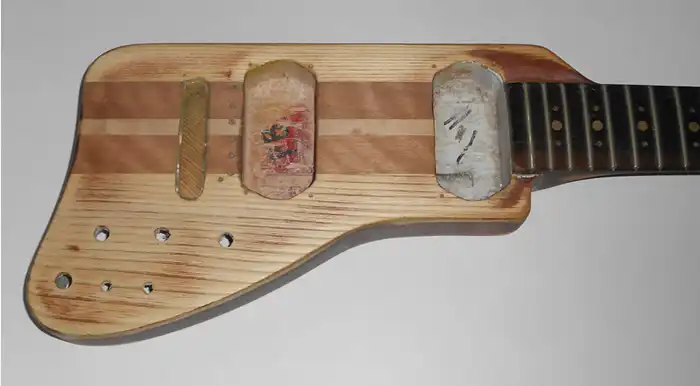
The dark mahogany wood with a blond maple "skunk" strip down the center is the through body mahogany and maple neck, which
extends from the headstock to the tail end of the body.
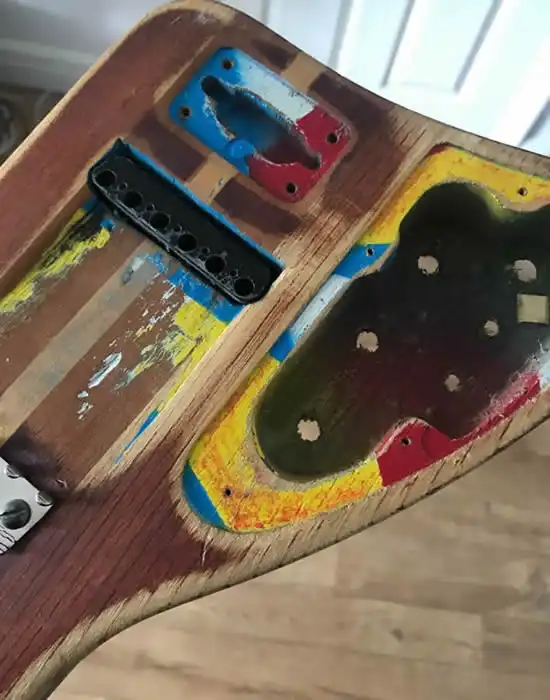
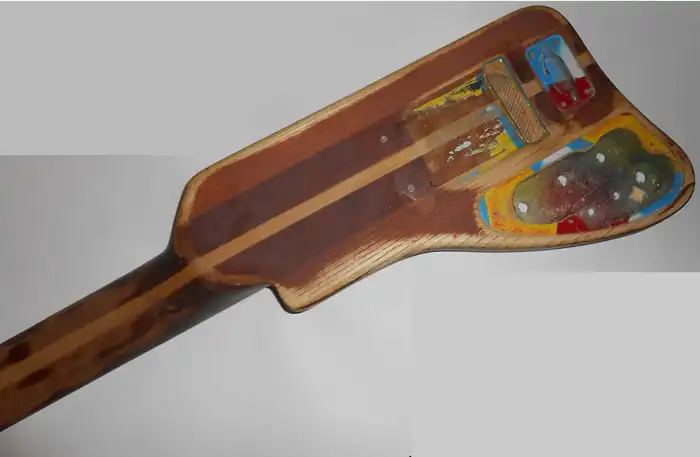
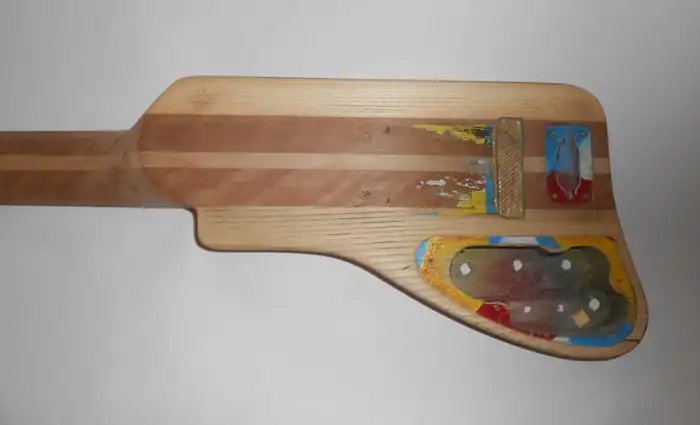
At one time the guitar would have been natural, unpainted wood, not the red, white, blue, and yellow colors seen in the photo
above. Another observation to note is the bridge setup to support a "whammy bar" is not of original design or build; the "claw"
to which the springs attach to the bridge "block" is outside a cavity and would be an uncomfortable irritation against chest
and abdomen.
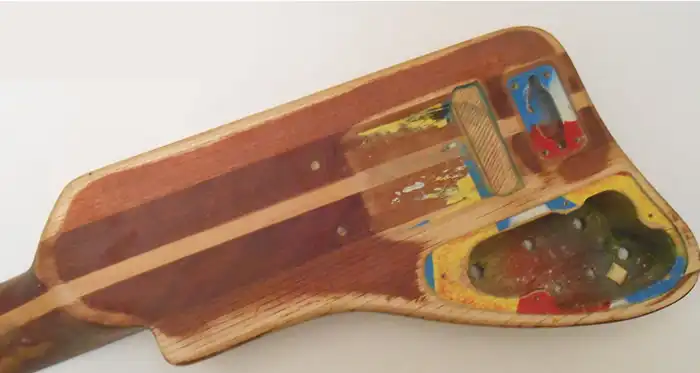
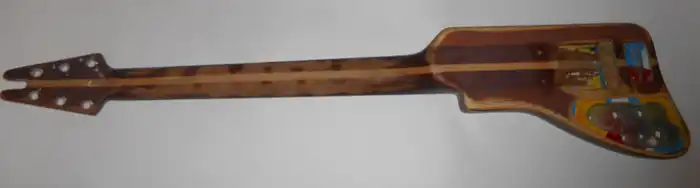
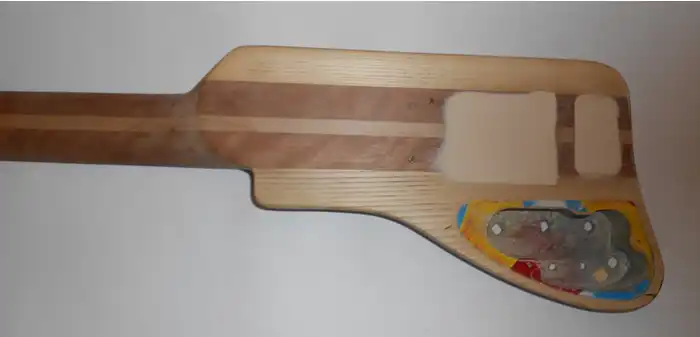
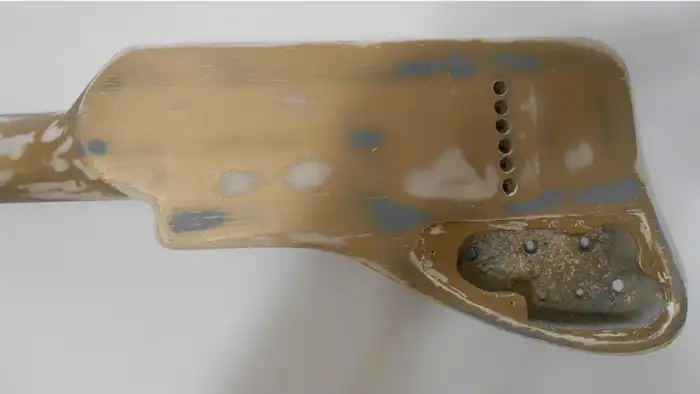
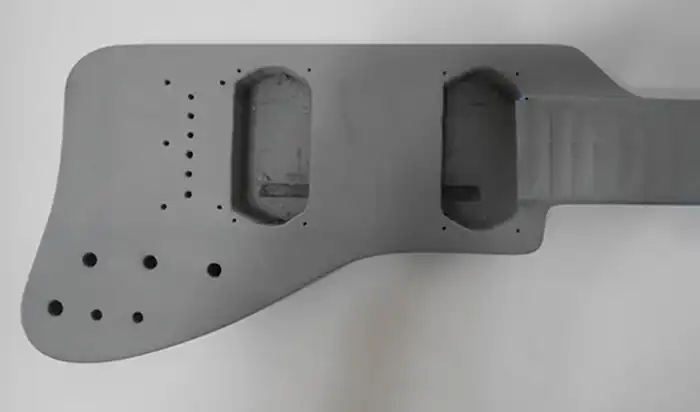
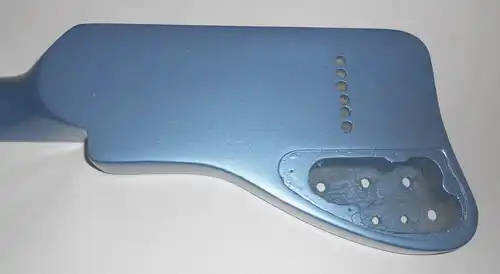
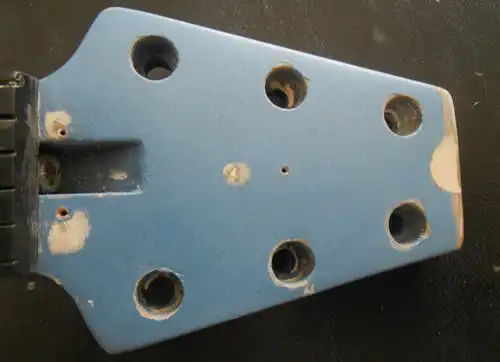
The rear view of the guitar body shows the tremolo claw and steel block installed, as noted the claw and steel block are off
center of the guitar's neck. And in addition, the body is not thick enough to place the tremolo system completely within a
guitar cavity.
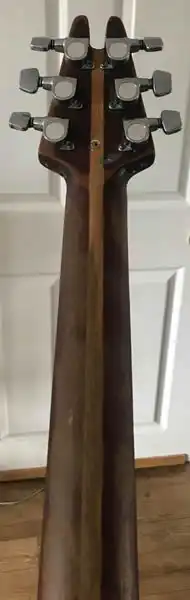
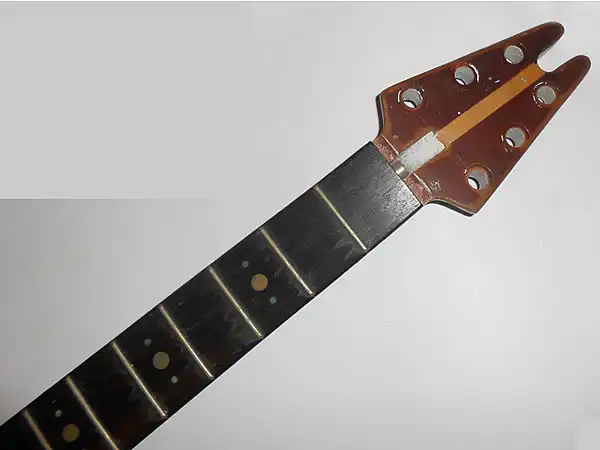
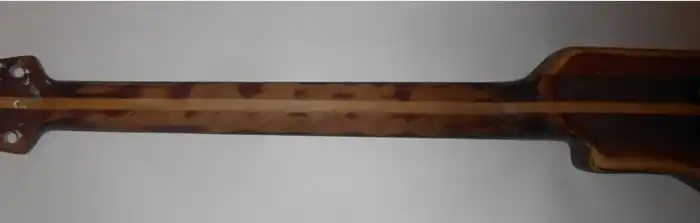
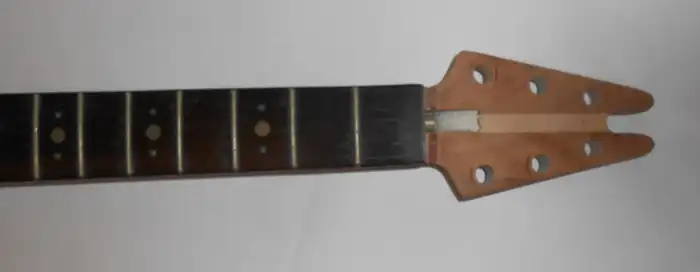
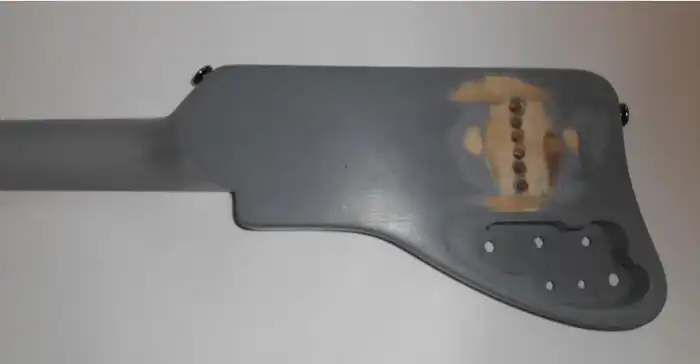
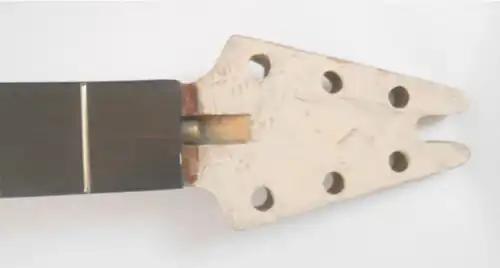
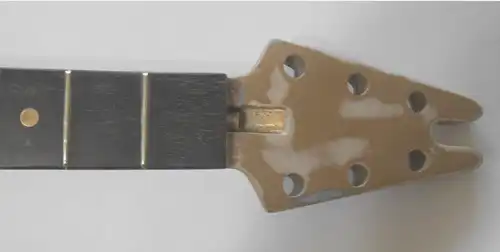
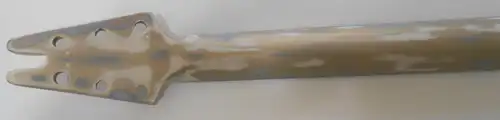
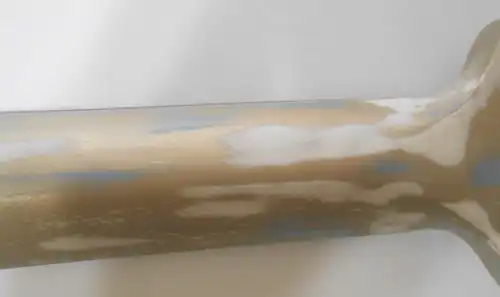
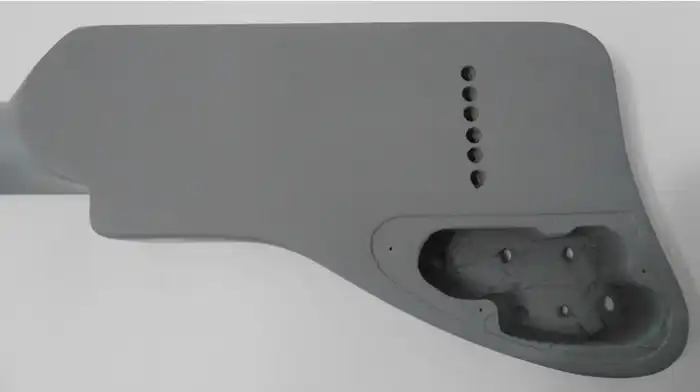
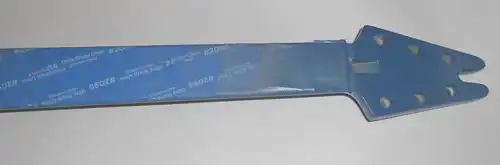
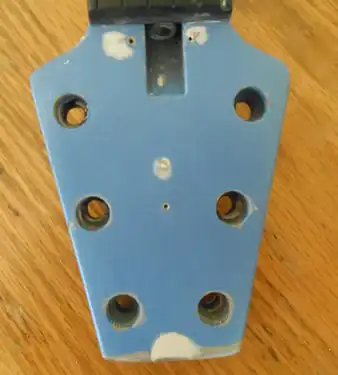
The well-worn back of the through body neck with blond skunk strip down the center. The screw hole on the back of the headstock,
in the maple wood near the base, was used to mount an original swivel for holding a guitar strap.
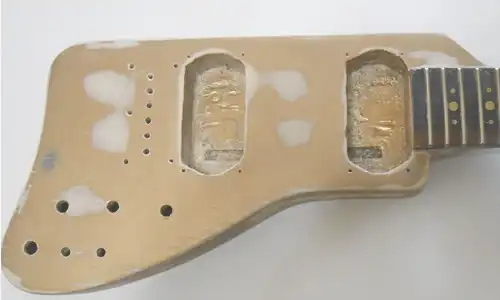
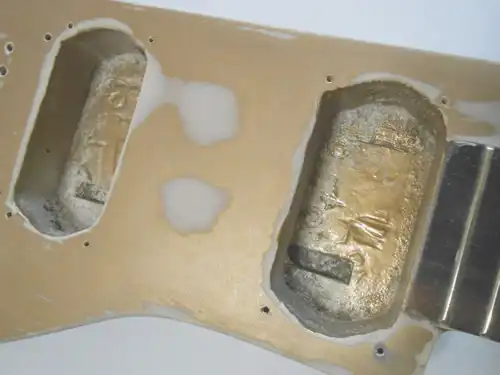
The claw and tremolo block were removed and filled with wood filler and a wooden block. The complete tremolo system weighed
about four ounces shy of one pound; and by removing the tremolo system it would shave half a pound from the overall guitar's
weight in comparison to a hard tail bridge.
The next step will be the cleaning and sanding of the body and neck. Cleaning and sanding will create a better bond between the
wood and the wood filler.
Removing impurities such as oil and glue residue requires little work. Note the wood glue shine on top of the newly installed
wood block; for a better bond, the top of the block should be carefully sanded.
The truss rod cover and nut were not included in the guitar purchase and would need to be replaced in the final stages of the
rebuild.
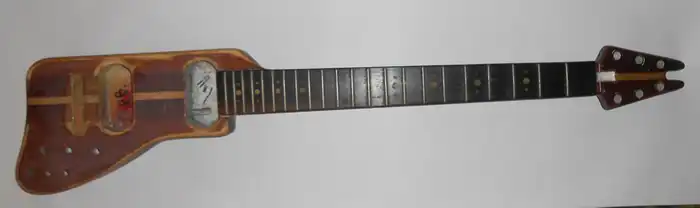
Built in 1981, before the 2017 restrictions on International Trade in Endangered Species of Wild Fauna and flora, when there
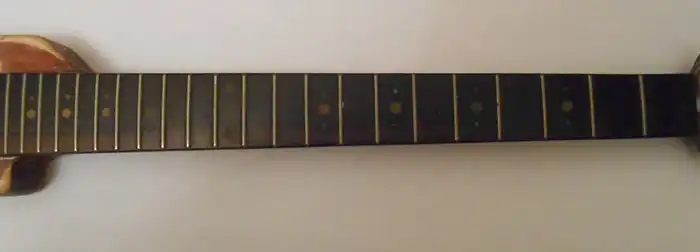
were no restrictions on the use of rosewood in new products, the fret board was made from a thick piece of rosewood.
Because the body was "mutilated" by the improper installation of the tremolo bridge, keeping the original guitar would not be a
concern.
The back of the headstock, indented from the original tuning machines, would need to be filled along with the screw holes for
the truss rod cover, tuning machines, and swivel strap "button".
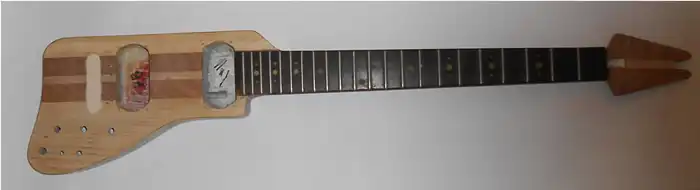
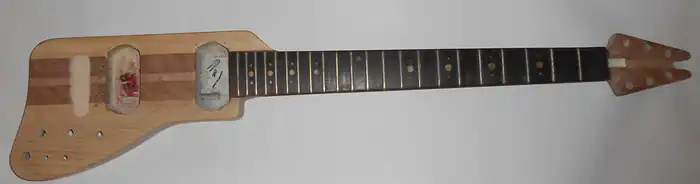
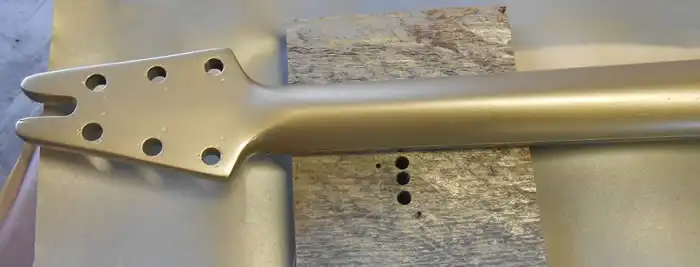
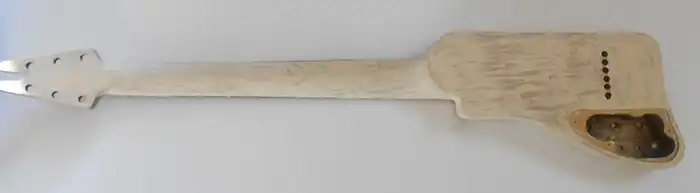
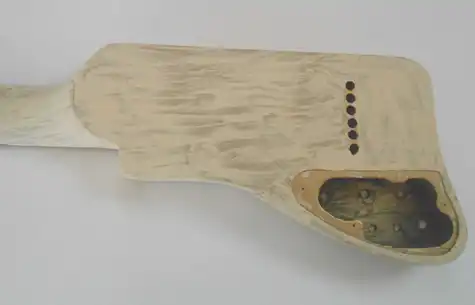
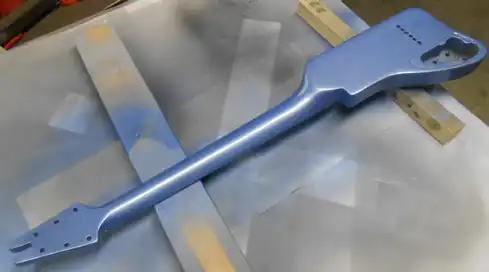
An overall view of the guitar before I started sanding the guitar.
A close-up view of the well-worn neck before sanding begins.
A close-up image of the guitar's body after sanding has already begun. The darkness of the body was due to the walnut stain and
not the natural color of the wood.
An overall view of the guitar after sanding has begun. Note the dark natural walnut color of the through body neck.
The back of the guitar body after sanding has begun. Note the paint in the guitar cavities and the paint sanding has not removed
in the area where the claw was removed due to the wood slanting downward.
The headstock of the guitar after sanding has begun.
The back of the headstock and neck after sanding has begun. The dark stain has been mostly removed, resulting in a more uniform
wood color.

A side view of the guitar after sanding has begun.
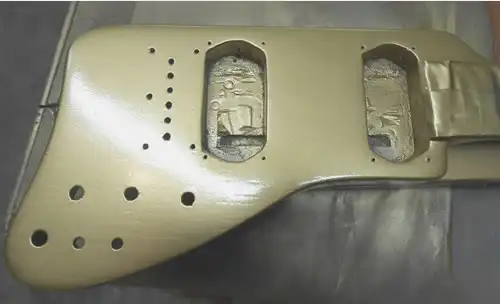
An overall view of the guitar after the sanding began and the off-center tremolo cavity was filled with wood filler.
A close-up view of the guitar body showing the tremolo cavity filled in with wood filler.
The back of the guitar body after applying wood filler to even out the tremolo cavity and the area where the claw was placed;
the guitar body was not designed for a tremolo and was not thick enough to completely shield the claw and tremolo inside a cavity.
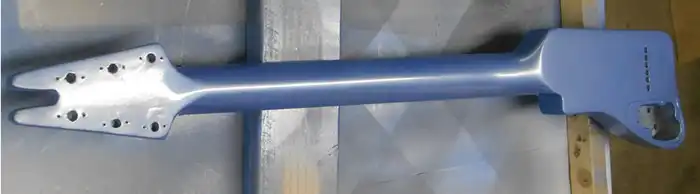
This is the final view of the overall guitar front before a paint primer was applied.
This is the final view of the overall guitar back before a paint primer was applied.
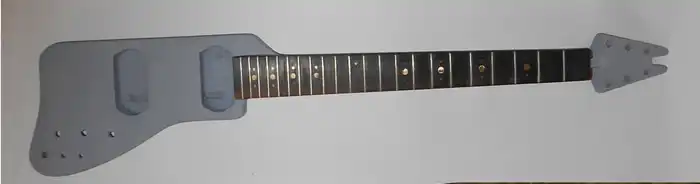
This is a front view of the overall guitar after a grey colored paint primer was applied.
A close-up view of the front of the guitar body after a grey colored paint-primer was applied.
The headstock of the guitar after a grey colored paint primer was applied.
A close-up view of the back of the guitar body after a grey colored paint primer was applied.

A side view of the grey primed guitar.

The front view of the primed headstock with locking machine heads. These machine heads may prove to be too heavy making the
neck "neck heavy" which requires the guitarist to constantly support the neck while playing.
This is the back view of the primed headstock with locking machine heads installed.
The back of the guitar body after the six holes for the string ferrules have been drilled and the adjacent area sanded once
again to smooth out imperfections. Note that oversize strap buttons have been installed.

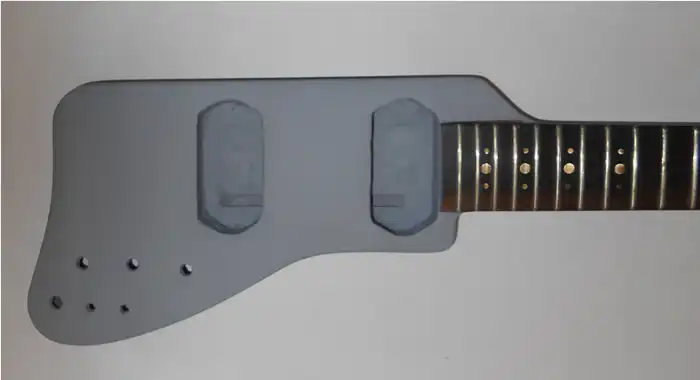
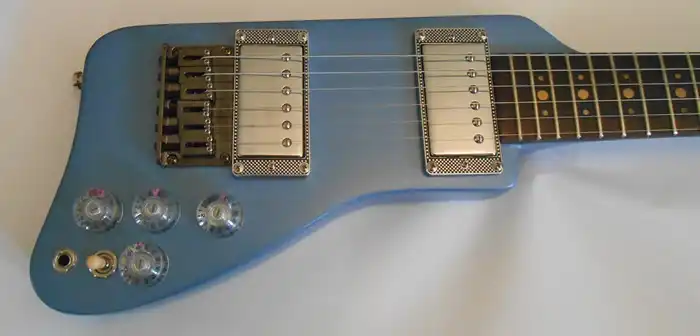
This is a front view of the guitar with installed strap buttons, bridge, Humbucker pickups, and machine heads.
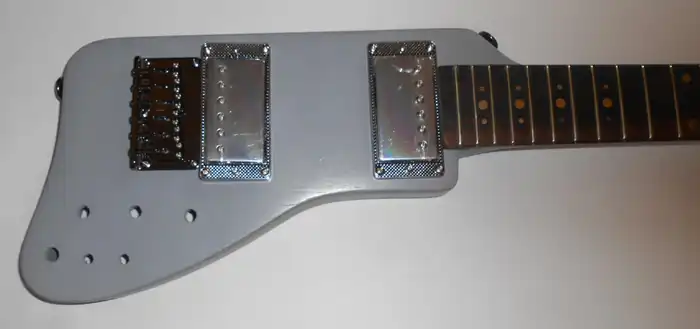
This is a close-up view of the grey primed guitar body with installed strap buttons, bridge, and Humbucker pickups.

Here we have an overall view of the back of the guitar after a first coat of gold automobile paint has been applied. I am not
sure whether I like the color.

Here is the view from the back of the guitar's body with the gold painted applied.

This is the view from the back of the guitar headstock and neck after a gold-colored automobile paint has been applied. Note the
indentation from the original machine head screws and post washers.
Another close-up view from the back of the guitar headstock after a gold-colored automobile paint has been applied.

Another view of the guitar's body from back after the gold paint had been applied. Note the wood grain is showing through the
paint.
Here is a view from the front of the guitar's body. Note the wood grain showing through the paint; I believe I may have to
reapply a "thin coat" of wood thinner to smooth out the wood grain showing through the paint.
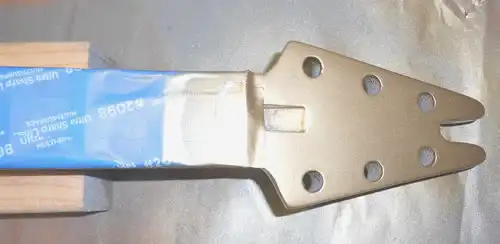
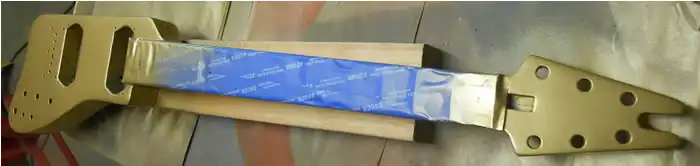
A view of the neck with painter's tape applied over the rosewood fretboard to protect the wood from any overspray.
Here is another view of the guitar with painter's tape applied over the fretboard to protect the wood from overspray.
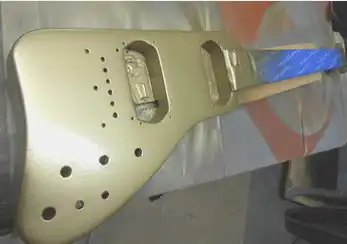
This is an overall view of the guitar's front after the gold automobile paint was applied.
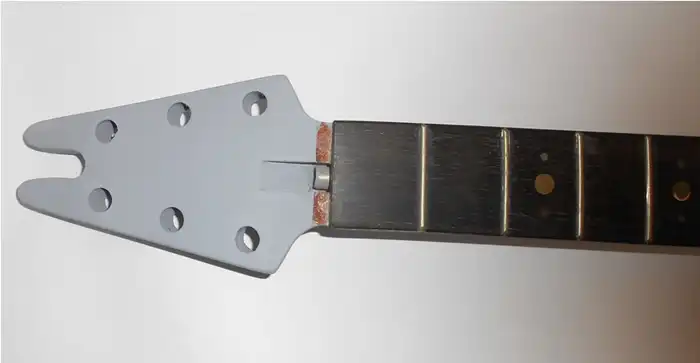
This image shows the black graph tech TUSQ XL guitar nut sitting in place as well as a custom-made truss rod cover.
In this image you can see that I decided to fill in both the wood grain, as well as the indentations that shown through the
gold automobile paint, by using watered-down wood filler. It is better to fix any issues before moving too far ahead and
making any corrections harder to repair.
This image shows the back of the guitar body after painting the guitar with watered-down wood filler.

In this image you can see that I have painted the headstock and neck generously with the watered-down solution.
And in this image, you can see that I have also painted the front of the guitar body copiously with the watered-down solution.
And here you can see I have generously applied the watered-down wood filler to the front of the headstock.
Using a fine grade of sandpaper on a wide sanding block allowed me to sand off the watered-down filler in areas where the wood
was perfectly level, leaving the areas that were indented and lower than the surrounding area, including the areas where the
wood grain was prominent.
Here is a view of the headstock after fine sanding and leaving the areas impacted over the years by the tuning machines.
Here is the full view of the front of the body after fine sanding the watered-down wood filler.
And here is the full view of the back of the body after fine sanding the watered-down wood filler.
Here is a close-up image of the back of the headstock and neck after fine sanding the watered-down wood filler. Observe the
regions where the wood was recessed below the surrounding areas, indicated by the amount of wood filler remaining on the
well-worn neck; as well as the sections where the wood was significantly indented and punctured by the tuning keys over the years.
Here you will notice in the image that the areas which were heavily "damaged" and where the wood "slopped down" the wood has
begun to look quite level.
A super close image of the back of the headstock and the residue that remains of the grey colored primer, gold automobile paint,
and watered-down wood filler. Now the headstock is about as level as it was on the showroom floor.
Here is another close-up image of the back of the neck where it meets the guitar's headstock.
A small amount of filler was needed on the front of the guitar body and the remaining holes are new drill holes required for
the new guitar's Humbucker pickups.
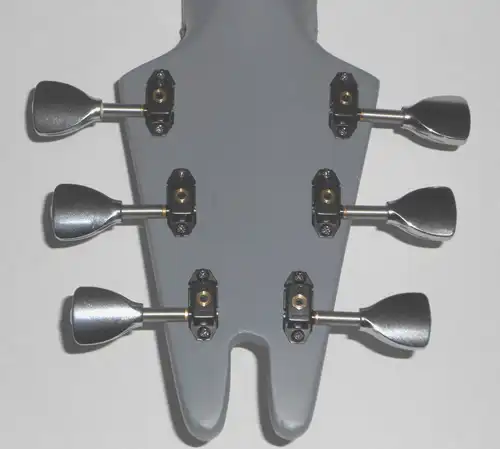
The guitar headstock once again primed grey, but this time, with incredibly lightweight 18:1 gear ratio Stealth Machine Heads.
These incredibly lightweight Stealth Machine Heads only weigh at about 0.4 ounces! There should not be in issue with the neck
being pulled downward from heavy tuning machines.
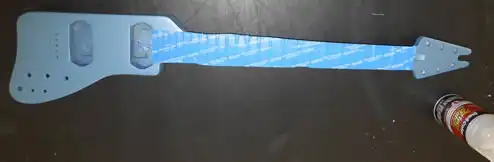
The front of the guitar body primed for the final time and ready for a fresh coat of automobile paint. The gold color will be
replaced by a blue colored automobile paint. Fender and Gibson Guitars were originally painted with automobile paint, often the
same color used on cars, but given a new color name when used on guitars.
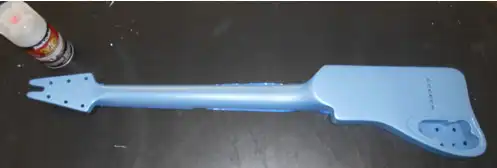
The back of the guitar body primed for the final time. The guitar is finally in factory-like condition making for a nice surface
for applying a fresh new coat of automobile paint.
A full view of the guitar's back after applying a coat of blue automobile paint.
Another full view of the guitar's back after applying a coat of blue automobile paint.

This is a full view of the front of the guitar after applying a coat of blue automobile paint.
This is a close-up view of the front of the guitar's body after applying a coat of blue automobile paint.
This is an image of the guitar's neck and headstock with the fretboard covered in painter's tape.
This is a close-up view of the back of the guitar's body after applying a coat of blue automobile paint.
A photo showing the guitar's neck, headstock, and back after seven coats of Polyurethane.
A full view of the front of the guitar after seven coats of Polyurethane had been applied, with painter's tape over the fretboard.
A full view of the back of the guitar after seven coats of Polyurethane had been applied.
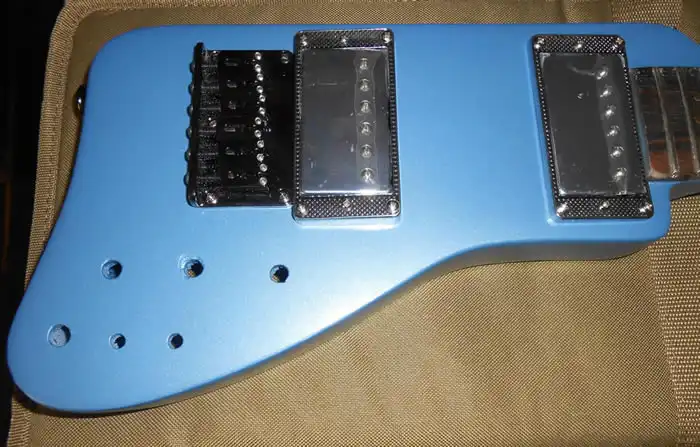
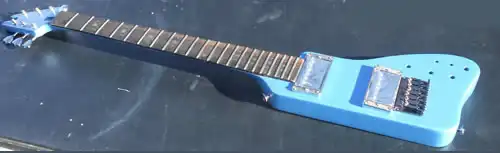
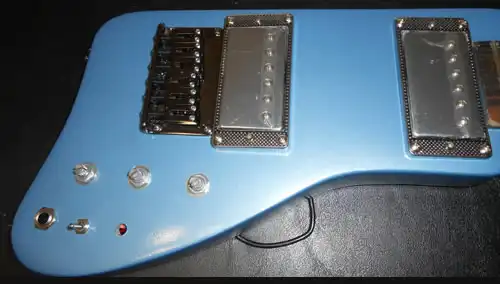
Here is a close-up view of the front of the guitar's body, with paint built up still within the control knob holes; with the
strap buttons, bridge, and Humbuckers installed.
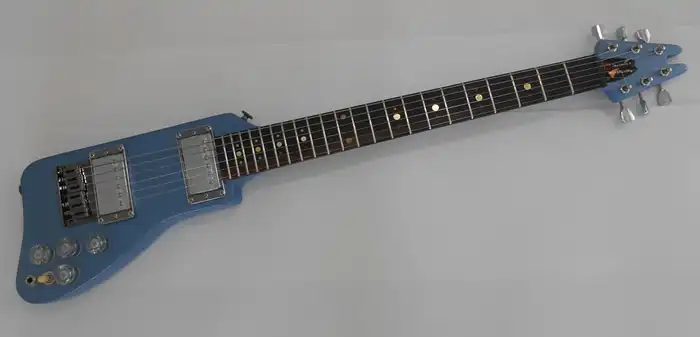
This is a full view image of the front of the guitar after the final coat of Polyurethane.
And another full view image of the front of the guitar after the final coat of Polyurethane.
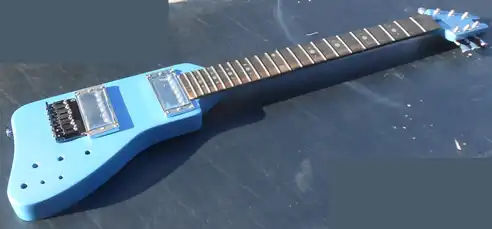
And yet, another full view image of the front of the guitar after the final coat of Polyurethane.
And still, another full view image of the front of the guitar after the final coat of Polyurethane.
And another full view image of the front of the guitar after the final coat of Polyurethane.
Here is an image of the front of the guitar's body after beginning to install the electronics in the control cavity.
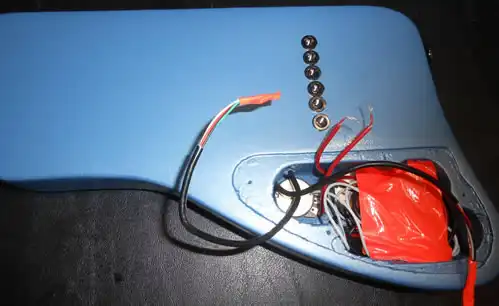
Here is an image of the back of the guitar's body after the beginning to install the electronics in the control cavity. After
the initial installation I will remove the components and shield the cavity with copper tape to control any unwanted feedback.
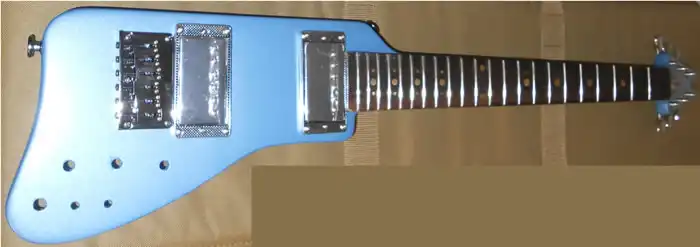
An image of the guitar front once the guitar was completed, or so I thought!
This is an image of the guitar's neck and headstock with the custom truss rod cover in place.
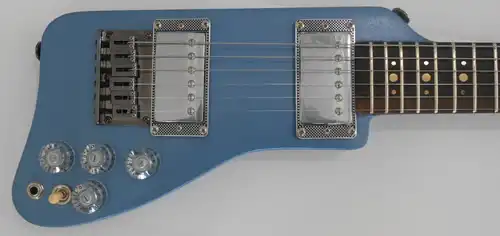
Here is a close-up image of the front of the guitar's body after completion.
I was not pleased with the "horns" on the headstock; and because the guitar is far from being original, I decided to remove the
horns.
Here is another view of the guitar's headstock after removing and filling in the "center" of the headstock horns to create a
flattened look to the guitar's headstock.
Here is a full view of the guitar after modifying the headstock, repainting the headstock, and installing the custom truss road
cover and Stealth tuning keys.
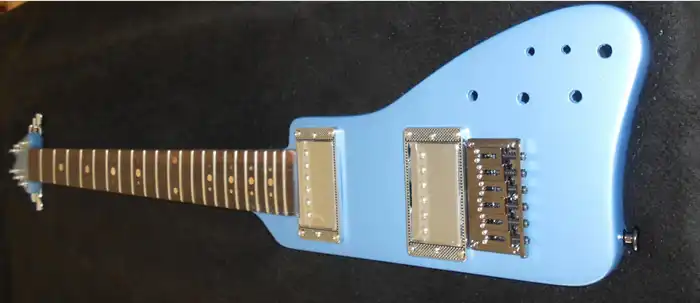
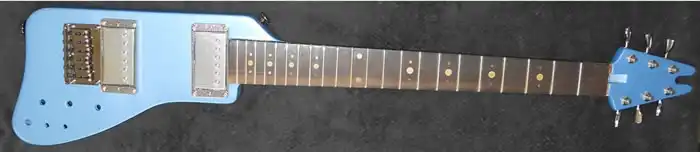
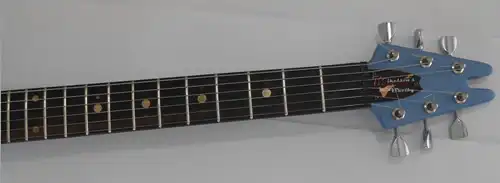
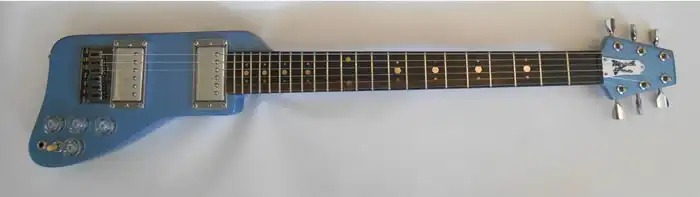
Here is a final close-up image of the guitar's body after completion.
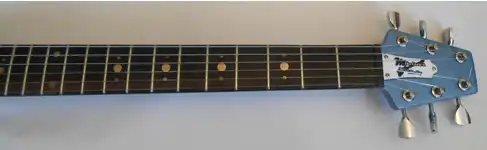
Here is a final image of the guitar's neck and headstock with the custom truss rod cover screwed in place.
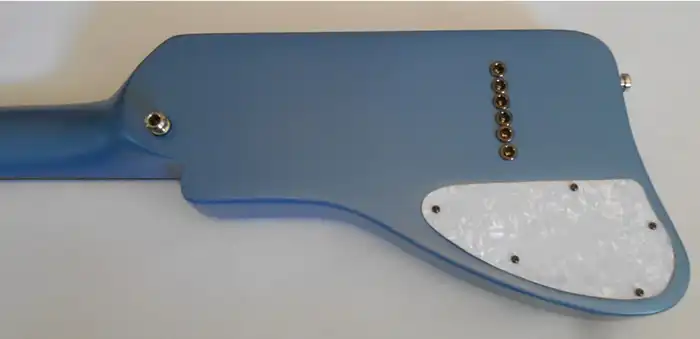
Here is a final image of the back of the guitar with locking strap buttons, string ferrules, and the control cover installed.

A final full view of the back of the guitar, notice the installed micro-tuner installed on the back of the headstock, positioned
for easy viewing while holding the guitar.

Here is a close-up final view of the custom headstock truss rod cover.
Add Comment
Insert Bullet List
Please enter at least one item.
Item:
Item:
Item:
Item:
Item:
Insert Numeric List
Please enter at least one item.
Item:
Item:
Item:
Item:
Item:
Insert Link
Please enter the link of the website
Optionally you can add display text
Insert Email
Please enter the email address
Optionally add any display text
Insert Image
Please enter the link of the image
Insert YouTube Video
Please enter the link of the video
Image Upload
Privacy Policy
This policy contains information about your privacy. By posting, you are declaring that you understand this policy:
- Your name, rating, website address, town, country, state and comment will be publicly displayed if entered.
- Aside from the data entered into these form fields, other stored data about your comment will include:
- Your IP address (not displayed)
- The time/date of your submission (displayed)
- Your email address will not be shared. It is collected for only two reasons:
- Administrative purposes, should a need to contact you arise.
- To inform you of new comments, should you subscribe to receive notifications.
- A cookie may be set on your computer. This is used to remember your inputs. It will expire by itself.
This policy is subject to change at any time and without notice.
Terms and Conditions
These terms and conditions contain rules about posting comments. By submitting a comment, you are declaring that you agree with these rules:
- Although the administrator will attempt to moderate comments, it is impossible for every comment to have been moderated at any given time.
- You acknowledge that all comments express the views and opinions of the original author and not those of the administrator.
- You agree not to post any material which is knowingly false, obscene, hateful, threatening, harassing or invasive of a person's privacy.
- The administrator has the right to edit, move or remove any comment for any reason and without notice.
Failure to comply with these rules may result in being banned from submitting further comments.
These terms and conditions are subject to change at any time and without notice.
{"commentics_url":"\/\/skoukor.com\/cmt\/","page_id":389,"enabled_country":true,"country_id":0,"enabled_state":true,"state_id":0,"enabled_upload":true,"maximum_upload_amount":3,"maximum_upload_size":5,"maximum_upload_total":5,"captcha":false,"captcha_url":"","cmtx_wait_for_comment":"cmtx_wait_for_comment","lang_error_file_num":"A maximum of %d files are allowed to be uploaded","lang_error_file_size":"Please upload files no bigger than %.1f MB in size","lang_error_file_total":"The total size of all files must be less than %.1f MB","lang_error_file_type":"Only image file types are allowed to be uploaded","lang_text_loading":"Loading ..","lang_placeholder_country":"Country","lang_placeholder_state":"State","lang_text_country_first":"Please select a country first","lang_button_submit":"Add Comment","lang_button_preview":"Preview","lang_button_remove":"Remove","lang_button_processing":"Please Wait.."}
{"commentics_url":"\/\/skoukor.com\/cmt\/","language":"english"}
|
Copyright © Skoukor Music 2025
|
||

|
||
Comments